Showing posts with label garden. Show all posts

Sunday, February 12, 2012

going green

as i mentioned in the diy terrarium post, i need some green in this house! since the garden centers weren't on my side for doggy-friendly plants, i decided to add some greenery to the bathroom. Lula doesn't like going in there since she thinks it means bath-time, and it's really a great environment for some tropical plants who love the humidity. might as well make those hot showers pay off!

the "zz plant" in my new ballard pot. it fills the corner nicely + the filtered light from the picture window is perfect for it.
 a succulent found a new home on the shelves...
and a curly fern sits atop the shelves...hiding some of the stereo. i really love the texture of these leaves!

downstairs, i added a little potted ficus...

and another fern found a home on the newly revamped bookshelves:

Thursday, February 9, 2012

diy moss terrarium

the last few weekends have been gorgeous here, so it's given me a little spring fever. our house doesn't have many plants in it, since i'm not much of a green thumb. but i've been determined to change that + took advantage of the pretty weather to pot a few plants for the house.


indoor plants not only add softness, texture, and color, but they also improve the air quality in the home. i struggled finding plants that were dog-friendly, and this is critical in our house since Lula's been known to chew on them from time-to-time. i consulted the ASPCA website's plant listing and left many garden stores frustrated with their lack of options. ugh.

i saw these moss terrariums from Twig Terrariums featured on Fab.com last week and figured i could make my own at a ridiculous fraction of the $99 flash-sale price. i even found this tutorial from Twig Terrariums themselves on how to do it.

a $5.99 vase from Homegoods, a 59-cent plastic saucer to use as the lid, a little moss, and a few supplies i already had, and i had myself a moss terrarium.

basically, just add the components in layers. the ladies at Twig Terrarium walk you through the step-by-step process, so i'll just show off my end result:

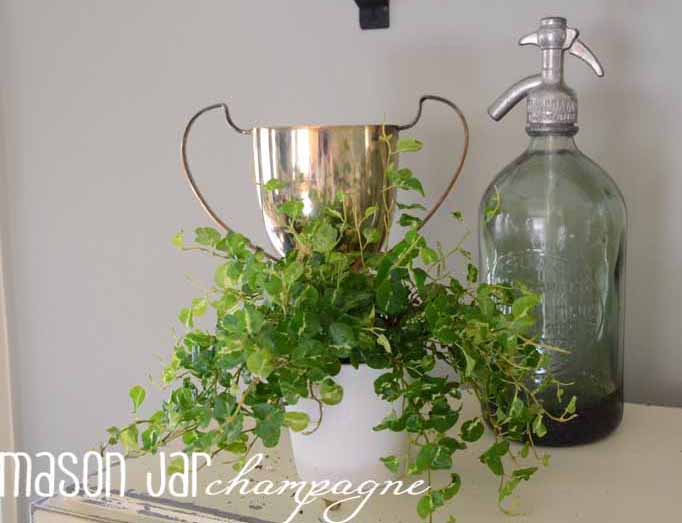
[i really love the vase i found. i may have to make some more of my own with a little gold acrylic paint + cylinder vases]


i also put together another terrarium, shown here on the bedroom bookshelves. it's not enclosed so it requires a layer of activated charcoal to keep it from getting funky. it has a simple fern in it for now, though i may add another plant so it has a buddy.


i got my moss from a craft store + a garden center. the rocks + soil i already had. i picked up the activated charcoal [aka activated carbon] at petco, and the smaller container was plenty.

i'm excited to see how these guys turn out after their ecosystems establish themselves.


Monday, June 13, 2011

fruits of the raised garden labor

Lookie here!!!


I'm happy to say the toils of building the raised garden beds is paying off!


We've been enjoying the spoils of basil for a few weeks, and it's going strong. I saw a WW recipe today for buttermilk-basil sorbet that I've gotta try, so stay tuned. if you have any basil faves, do tell!


The squash plant is outta control, so I've pruned it back a bit--hopefully not ruining it in the process. some of the spinach seemed to dwindle, so I popped in an okra plant. OH YEAH. faux fried okra here we come! okay, maybe we'll splurge on the real thing with our very own okra. the hard work's gotta pay off, right?


The bell peppers are off to a slow start, but we have one poblano so far. Maybe we'll have salsa soon! I don't know how to tell when the onions or cukes are ready, anyone know?? They're hiding under the soil from me cuz they know their fate.


The citronella plant actually seems to be effective, much to my surprise. it gives off a gentle scent--not as awful as the candles, and actually works. no greasy sprays, no melted wax, no smoking tiki torches. Not bad for a $4 plant.

very happy to make Modena and Toney proud!! who knew I inherited a green thumb? it probably helps that I married someone who remembers to water the plants.

Sunday, May 8, 2011

Grassy Pavers


With the pavers installed, we needed to lay the grass between the pavers to help hold the pavers in place. I wasn't sure if seeding or sod would be the best way to go. I was concerned that sod would dry out against the cement pavers. But I was worried that seeds may not grow in fully enough in time for the shower in a few weeks. I couldn't have guests tripping around on the pavers.
[ta-da! the new patio]

So I decided on sod. I was torn between grass types. Bermuda or Fescue or Zoysia? Well, the area is too sunny for fescue. And Cricket isn't crazy about Bermuda. Zoysia it is!

Unfortunately, NO ONE SELLS ZOYSIA IN GEORGIA. Unless you need an entire pallet, that is. Which, we certainly didn't. Ugh. Cricket called his contracting buddy, who was apparently having zoysia installed at a project soon. We hoped the landscaper would add a few pieces to the order for us. Turns out, the landscaper was installing that week--and he had extra! FOR FREE!! SCORE!!!!! We'd just need to pick it up on the day he installed it....whenever that may be.

We just didn't know when we'd get "the call" to come pick it up. But on April 27, "the call" came. In case we needed any motivation, this was right on our heels:
[weather radar of the tornadoes in AL, heading our way]
We were already worried about getting the sod in before the rain came so our sand wouldn't wash away...but this storm was SERIOUS. When I got home from work, we switched into super-fast mode. Cricket was cutting the sod pieces as I laid them. He used a rusty machete, but honestly, scissors would've worked too.

Luckily, the whole pieces of sod were perfectly sized for the larger gaps between the pavers. That wasn't planned, but I encourage it for anyone planning something similar.

[almost done...here come the storms]

we finished just before dark. the rains came shortly after to give the sod it's first good soak.

before:

after:

[to do: build the bench, find a few accessories, grab a cocktail!]

style="text-align: left;">


linking up to Kate's summer outdoor party so check out the other great ideas!

Paver Prep

The tiered planter was just the beginning phase of the patio transformation. The overall plan includes:
  • tiered planter
  • built-in bench seating
  • creating a lower patio, to serve as a seating/lounge area
  • improving drainage; reducing water flow into the crawl space
  • installing a french drain
  • creating a "flow" from the backdoor, through the upper patio, through the lower patio, into the lawn
With the tiered planter complete, we prepared the grassy area for its transformation into a patio.

We rented a tiller and tilled up all of the grass & dirt between the house and fenceline. Once tilled, we moved the dirt around to level out the area as much as we could. At this point, we installed the french drain.
[cricket moving dirt]
We wanted to maintain some slope away from the house, to avoid standing water or water in the crawl space, so it isn't 100% level. We also ran into a ground wire that we had to work around.

Then we laid landscape fabric to help with weed prevention.
[after about 15 bags...plenty more work to be done]

We spread about 40 bags of sand throughout the area to help fill in major holes and provide a paver base. We tamped the sand to compact it and [hopefully] reduce future settling.
[this was the 2nd batch of sand we bought. so. much. sand.]
I called ahead to pre-purchase the pavers and extra sand, and they had it ready to load with a forklift. We rented a flatbed truck to bring these suckers home from The Home Depot, and found a few friends to unload the suckers into the yard. We were able to rent the truck, load the pavers, unload the pavers, and return the truck within the basic rental timeframe [75 minutes], so it was a minimal expense.

Getting the pavers (37 pounds each) from here:

  ...to here:

...cost us $50 and 2 bottles of water. We probably also owe the neighboring churches a sincere apology for the truck's backup "beep-beep-beep" during their Easter service.

Once the sand was in, it was time for the pavers. Cricket had some studying to do, so it was up to me to put the paver puzzle together. I'd mapped out the design using a combination of 16"x16" concrete pavers and 8"x16" concrete pavers, all being 2" thick.


The pattern was designed to allow 3" of grass to grow between each row of pavers, and the pavers would start to thin out as the patio opened into the lawn.

I used a 2x4 to help level the sand. Dragging the 2x4 across the sand helped to fill in & level the area I was working with. It's much easier to work a small section at a time. I use 2x4 scraps as spacers, too. Then, I just followed my pattern and laid the pavers one by one.


The pavers are each about 37 pounds, so it was like doing squats with 40-pound weights. I paid for that the next day. And the next. And the next.

French Drain

As part of the landscaping patio project, we installed a French drain. We had some issues with water in our crawl space, so we were convinced the existing drain wasn't working.

The first step was to remove the existing French drain. It was improperly installed and didn't have a filter sock. As a result, the pipe had collapsed, and--much to the pleasure of Lula & visiting Abby--there was a dog toy stuck in the pipe. [i would be lying if Abby + i didn't take a little fetch break while cricket dug away at the trench. but it was a short break. i promise. the old girl needs her kicks!]

Deepen the trench to at least 12", so that it slopes away from the house. We extended the length of the drain so it would empty near a future flower bed instead of the middle of the lawn.


Fill the bottom of the trench with drainage rock:

Lay the perforated pipe into the trench:

We also tied in the downspout to the trench, to move that water away from the house, too. This was done by cutting a length of perforated pipe to the length where the downspout would join the trench. Both the downspout pipe and the perforated pipe were fed into the top of the "Y" and placed into the trench. Then, a piece of perforated drainpipe was inserted into the opposite end of the "Y" and laid into the remaining length of the trench.

The end of the perforated pipe should come to the surface of the ground, following a slight incline if necessary for the slope.

Once the drainpipe is in the trench, cover with drainage rock.

Cover the drainage rock with sand and topsoil and sod. Or, you could continue the project and cover with sod, pavers, and a fancy new patio!
    Voila.

    The hardest part is the digging. And the digging. Did I mention the digging? Since this was part of a larger patio makeover, we rented a tiller--which definitely helped the process along. Removing the existing trench's gravel was painful. I felt like we spent 5 hours moving dirt from one pile to another. But, so far, despite the crazy tornadoes and thunderstorms of the past week, we haven't seen much water in the crawlspace. It's definitely an improvement. SUCCESS!!

    project costs:
    25 foot flex perforated drainpipe with filter sock: $20
    5 bags of sand: $16
    7 bags of drainage rock: $24
    tiller (though rented for another project too): $34

    this was also a great excuse to purchase:
    a wheelbarrow (for hauling the sand + rock)

    Tuesday, April 12, 2011

    need your help with landscape design!

    greetings blogland! i call on you today for helping with a critical decision. you've seen the tiered garden here, here, and here. the original plans call for a bench in front of the box, but we can't get started on the bench until we figure out what we want to do with the patio area.

    we'd like to extend the living space into the lawn, and just can't decide what types of pavers we want to use. the space in front of the tiered planter measures 12' across and we'd like to extend about 18' towards the back yard.

    the upper patio is the old parking pad, thus concrete. it's been painted & we're currently pressure washing to remove the chipping paint. i'm thinking of staining it afterward. i tell you this because whatever we lay in the current grass area below will need to be cohesive with the upper patio and "flow" aesthetically.

    from the original listing photo
    then the lower area we're working on. the bench will go in front of the planter. the new patio area will extend from the base of the planter & stairs for about 15-18 feet, running along the house on the right and the fence on the left.


    at the edge of the house, the backyard opens up like this:

    we plan to put some beds around the edges of the yard, maybe a new [read: taller] privacy fence.


    requirements:
    1. provide extra seating/entertaining space for 2 club chairs, 1 chaise, and a side table (plus the bench). we've already bought the furniture.
    2. help with water run-off into the basement
    3. be a clean design
    4. use inexpensive materials that will live up to full afternoon sun elements & all-season weather (i knew folks once who used some fancy slate in their outdoor walkways THAT COULD NOT GET WET WITHOUT DISCOLORING. luckily, they had a staff who would literally wipe it down anytime it rained. did i mention this was on the gulf coast, ocean front? beautiful, yes. sensible, not so much.) i don't have a wipe-down staff, so this is not an option.


    here are some ideas we like...
    via

    via
    via

    i like the larger square pavers, at least 20" square. i'm thinking of a tighter pattern nearest the bench, slowly expanding as the lawn opens up.


    are we nuts to want grass between the pavers? is that a maintenance nightmare? anyone have any experience with this?

    do you like tighter spaces, or larger spaces between the pavers?

    also, what should we grow between the pavers? i've heard dwarf mondo grass as used here, but it seems kinda bushy.


    or blue star creeper like this, which according to the Pike's Nursery sales flyer "spreads to form a low, dense mat. Tiny sky blue flowers emerge in late spring and last until early fall." that sounds nice, right?

    or this scotch moss as suggested when i used the handy tool at stepables.com

    or this miniature brass button groundcover from stepables.com?


    decisions, decisions, decisions.

    please help!!! 

    we need to figure out the pattern AND the materials, so all input very very very welcomed.